How to upload a logo to a Europa?
1. Create your logo using a design application e.g Microsoft Paint.
2. Ensure the logo is set to a maximum 320 x 240 pixels.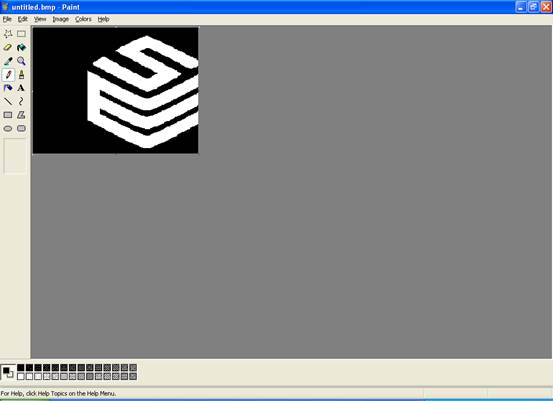
3. Save the image as ‘Monochrome Bitmap’.
4. Please note that the white colour on the bitmap image will come out as black on the label. If this is not what you require, please select ‘Image’ from the top tool bar then ‘Invert Colours’.
5. Connect your tester to the PC.
6. Open the PATGuard 2 program through the ‘Start’ menu and follow the links through to the ‘Tester Logo Transfer’ program.
7. Once opened, change ‘Test N Tag Logo’ to ‘User Defined’ using the drop down menu.
8. Next click ‘Browse’ and search for your logo. This will be in the file where it was saved in step 3.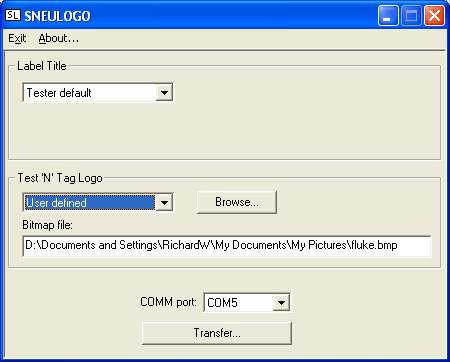
9. Once you have located the file, ensure that the correct Com Port is set and click ‘Transfer’.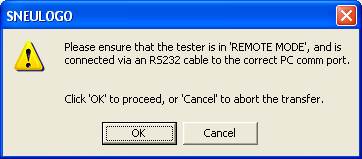
10. On the tester select ‘Remote Mode’ from the Main Menu. Press ‘Yes’ (Green).
11. On the PC click ‘OK’.
12. The logo is uploaded and ready to use with the Test N Tag printers.
I'd like to talk to a sales advisor










Sign up to our Newsletter.
Stay up to date with the latest industry and product news, as well as our free educational content such as webinars and our expert guides.
Close