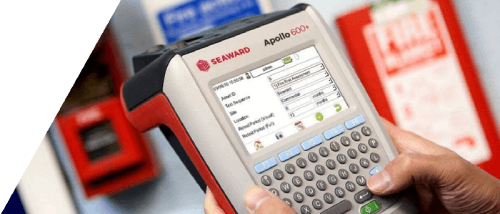
How to upload data into the Apollo 600+ and 500+ from PATGuard 3?
The following document is intended to be a troubleshooting guide to ensure you are uploading to PATGuard 3 in the correct manner (note: you cannot upload to the Apollo 400). Please check all aspects of this before contacting the technical support helpline.
1. Please register your Apollo to receive an additional 12 months warranty plus full access to Product Support. You can do this at www.seaward.com/warranty24 or by completing the form in the “Care and Support” card and returning by post.
2. Please ensure your Apollo has the latest firmware installed, to do this please see the following link: www.seaward.com/apollo-series-firmware
3. Before attempting an upload we suggest you perform a download from your Apollo Series to PATGuard 3, as this will confirm your PATGuard 3 software / database is working correctly – see Application Note 0066 “How to Download the Apollo Series into PATGuard 3”.
4. On the Apollo “Home Screen” ![]() select menu/options, function key “F4”.
select menu/options, function key “F4”. ![]()
5. In the menu select “Upload” by using the arrow keys or selecting, key number “7”. ![]()
6. In the “Upload data into Apollo” field select “From PATGuard 3”, using the arrow keys to select from the dropdown menu.
7. In the “using:-” field select “ USB-PC cable”. An additional Apollo drive (for example ApolloXXXX:) will appear on your PC. (Apollo 500 or 600)
or
In the “using:-” field select “![]() Flash Memory Stick” (Apollo 600 only)
Flash Memory Stick” (Apollo 600 only)
8. In PATGuard 3, If you have not already, select “Instruments” and “Add Test Instrument” ![]()
9. In “PAT Testing” ![]() , select the “Site” or “Location” you wish to upload.
, select the “Site” or “Location” you wish to upload.
10. Select the “Data Transfer” tab and “Upload to Tester”![]() , select the “Destination” test instrument and correct drive (from the dropdowns – this will be either the ApolloXXXX: drive or Flash Memory Stick drive from step 7 ) - next select the Site & Location you want to upload including the data to be included (where applicable) - press “OK”.
, select the “Destination” test instrument and correct drive (from the dropdowns – this will be either the ApolloXXXX: drive or Flash Memory Stick drive from step 7 ) - next select the Site & Location you want to upload including the data to be included (where applicable) - press “OK”.
11. A message saying – “File Saved Successfully :\ApolloUpload.gar” should appear on the PC
12. On the Apollo the message “Save data to Apollo drive, press F3 when done” – select using the function key “F3”![]() . The following message will then appear on the Apollo “Valid Data files from PC. Select one of these files and press F4”. Select the file containing your uploaded data (/ApolloUpload.gar) , using the arrows keys, and save by selecting “F4”
. The following message will then appear on the Apollo “Valid Data files from PC. Select one of these files and press F4”. Select the file containing your uploaded data (/ApolloUpload.gar) , using the arrows keys, and save by selecting “F4”![]() (USB-PC cable, Apollo 500 or 600)
(USB-PC cable, Apollo 500 or 600)
or
After transferring the USB memory stick (you will receive a message if you have not done this), in the field below “Valid data files from USB memory stick. Select one of these files and press F4” - select the file containing your uploaded data (/ApolloUpload.gar), using the arrows keys, and save by selecting “F4” ![]() (Flash Memory Stick, Apollo 600 only)
(Flash Memory Stick, Apollo 600 only)
Note: When selecting one from multiple files please ensure the correct file is highlight.
13. A message saying “SSS data uploaded OK” will be shown on the Apollo.
Note: The uploaded data is displayed in a different location to the already tested data: On the Apollo “Home Screen” ![]() select menu/options, function key “F4”
select menu/options, function key “F4” ![]() , select “View Data”, by selecting number “1”
, select “View Data”, by selecting number “1” ![]() and then the filter button by selecting “F2”
and then the filter button by selecting “F2” ![]() . In the “Select Tests” section select “Uploaded Data” using the blue arrow keys and accept using the function key “F3”
. In the “Select Tests” section select “Uploaded Data” using the blue arrow keys and accept using the function key “F3” ![]() . In this new list all the uploaded data will be displayed.
. In this new list all the uploaded data will be displayed.

I'd like to talk to a sales advisor


Sign up to our Newsletter.
Stay up to date with the latest industry and product news, as well as our free educational content such as webinars and our expert guides.
Close